Upgrading to Xcode 4.3
Xcode 4.3 was released on February 16th. It is now truly a Mac App Store application.
With Xcode 4.2, you downloaded an “Install Xcode” application from the Mac App Store, which in turn “installed” Xcode in the usual location, “/Developer”, which is a folder named “Developer” at the root of your hard drive.
Furthermore, if you wanted Xcode to automatically update (from the Mac App Store), you had to keep the “Install Xcode” application (1.8 GB) in your Applications folder, as that was what the the Mac App Store actually updated; you then had to run “Install Xcode” manually to update.
This has changed for the better.
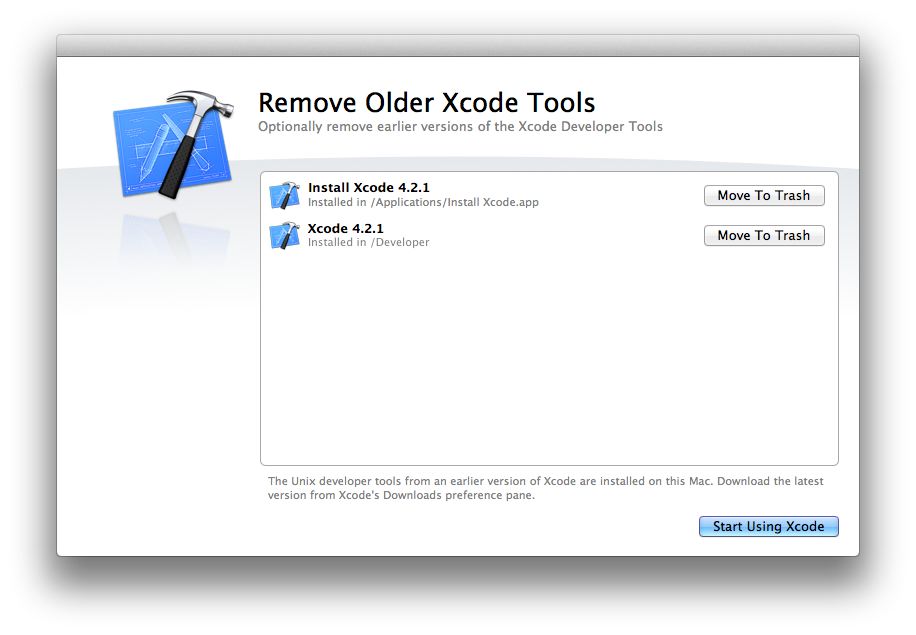
Xcode.app now installs directly in the Applications folder. In fact, it will helpfully propose to move the older, obsolete installation to the Trash for you:
Xcode is also smaller, since a lot of (probably) lesser-used software has moved to optional downloads. Peter Hosey has a comprehensive list.
In my case, I had one more thing to do: install the command-line tools. They can be found in Xcode > Preferences > Downloads > Components. To get them working properly, here is what I had to do:
sudo xcode-select -switch /Applications/Xcode.app
This updates the command-line Xcode tools to point to the new location, and is only important if you are migrating from 4.2. A new install should work fine.- Install autoconf. Some of my projects (and many unix-based ones) use autoconf to generate ‘configure’ files, and this tool is missing from the new install. It was present in earlier installs, so I have filed a radar.
In the meantime, I was able to download the latest version (2.84 at the time of this writing) and install it with the usual./configure; make; sudo make installdance - Update any scripts that have a hard-coded ‘/Developer’ path.
Since everything is in the ‘/Applications/Xcode.app’ bundle, the new path is ‘/Applications/Xcode.app/Contents/Developer’. If you don’t want to hard-code it (for instance, if you use Xcode 4.3 but your colleagues are still on Xcode 4.2), you can use the output ofxcode-select --print-pathto find the path to ‘Developer’ on any system. This works in Xcode 3 as well.
Xcode 4.3 requires MacOSX Lion 10.7.3.
It should be noted that hardcoding a /Developer path to reach e.g. the iOS compiler or SDK root has always been a mistake. In the place where I worked I set up the system as such: one has to add to his environment the location of the Xcode folder in a variable named _XCODE_DIR; from there, the scripts use xcodebuild to get the host tools root path and the SDK root for the latest SDK (if you pass a SDK name with the version mission, e.g. -sdk iphoneos, it will return info about the latest version), for both Mac and iOS. The advantage (compared to xcode-select –print-path) is that you can easily set to compile with a Xcode which is not the default, which was useful for me when I would need to keep multiple installs of Xcode around for experimental needs.
I don’t think that requiring an environment variable is the best choice. Allowing an env var is good, especially if it overrides a default (for instance, in the case of multiple Xcode installs), but you still need a sensible default. The output of xcode-select –print-path should be a reasonable default.
Thanks for reading!
Maybe I should have, indeed. Since I was responsible for all iOS dev infrastructure and people did what I said, I got away with not doing it. 😉
Makes sense 🙂
Thank for posting Philippe. This was a big help.