Pimp my IKImageBrowserView: Slide Show
After listening to Frasier Speirs on Late Night Cocoa, I decided to take a look at ImageKit, a new Leopard-only technology that contains the most interesting parts of iPhoto.
I had a need for an Image Browser, so I tried the (very well-written) Browsing Images Programming Guide. At the tutorial’s end, I had a “Browse Images” application: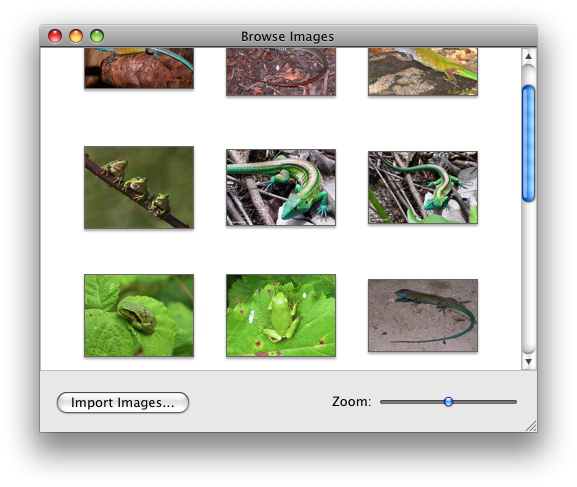
If you haven’t done so, you can do this tutorial too. I will wait until you’re done…
… All done? Great. I wanted some extras in “Browse Images”, for example a slideshow and a filter. There is a guide to build a slideshow application, but it makes you write a separate application. We already have “Browse Images”, surely we can re-use it?Adding a slideshow
The IKSlideShow class is very simple. One call makes it all happen:
[[IKSlideshow sharedSlideshow] runSlideshowWithDataSource: (id) self inMode: IKSlideshowModeImages options: nil]
The objects have to implement the IKSlideshowDataSource protocol, which requires at least two methods:
	- (NSUInteger) numberOfSlideshowItems
	- (id) slideshowItemAtIndex: (NSUInteger) index
That looks familiar. For the IKImageBrowserDataSource protocol, we already implemented similar methods:
- (int) numberOfItemsInImageBrowser: (IKImageBrowserView*) view
{
	return [mImages count];
}

- (id) imageBrowser: (IKImageBrowserView*) view itemAtIndex: (int) index
{
	return [mImages objectAtIndex: index];
}
The only difference is the objects returned by (id) imageBrowser: itemAtIndex: had to implement the IKImageBrowserItem protocol, but they still returned an NSString*, a path to the image file.
(Another difference is the objects could be of more image types, but we will leave that for another time.)Implementing the IKSlideshowDataSource protocol
In your ImageBrowserController implementation, add the missing methods to make the slide show work:
- (NSUInteger) numberOfSlideshowItems
{
	return [mImages count];
}

- (id) slideshowItemAtIndex: (NSUInteger) index
{
	int i = index % [mImages count];

	return [[mImages objectAtIndex: i] path]; // path? Where did that come from?
}
The first method is the same as before, while the second one returns not a MyImageObject (what is stored in mImages), but the path of that object. To get this path, simply add an accessor to MyImageObject:
- (NSString*) path
{
	return mPath;
}
(Also add the prototype to the interface, lest you get a warning…)
Tying it together in Interface Builder
Now that our controller conforms to the IKSlideshowDataSource protocol, we need a way to start the slide show. To this end, create an IBAction in the controller’s interface, and implement it like this:
- (IBAction) startSlideshow: (id) sender
{
	if ([mImages count] > 0)
	{
		[[IKSlideshow sharedSlideshow] runSlideshowWithDataSource: (id) self inMode: IKSlideshowModeImages options: nil];
	}
}
Create a button in Interface Builder, and Control-drag it to your controller to connect it to the startSlideShow: action (IB 3 should have automatically picked up the change in your header file and offer you the new action).
Build and run. You should be able to browse pictures like before, and pressing on the “Slideshow” button should start a full-screen slideshow, complete with index sheet.